Wednesday, 22 February 2012

How to install or update VLC 2.0 media player in Ubuntu

If you are using VLC media player in Ubuntu then there is an update in VLC. VLC player released its 2.0 version on their ppa repositories. There is two ways to install VLC player in your Ubuntu. First you add their ppa yo your software sources by the this instruction. Or you can add it from terminal, for that you have to enter the following commands in terminal.


For install VLC 2.0 enter the following commands.


   sudo add-apt-repository ppa:n-muench/vlc
   sudo apt-get update
   sudo apt-get install vlc


And for upgrading from its lower version enter the following commands.


   sudo add-apt-repository ppa:n-muench/vlc
   sudo apt-get update
   sudo apt-get dist-upgrade


Apart from that in VLC 2.0 many new features and support for many new codes are included. And one new experiment for Blu-Ray is there so it can play Blu-Ray also but as it experimental, some problems are there for Blu-Ray.

Sunday, 5 February 2012

How to establish Mobile Broadband connection in Ubuntu

In this snapshot tour you can find tutorial of how to establish mobile broadband connection using Mobile with data cable or bluetooth or using any USB wireless modem. Here is the steps of establishing connection.


First open network connection from your dash [if you are using ubuntu 11.04 or higher version] or from system -> preference -> network connection [if you are using ubuntu 10.10 or lower version]. Then go to Mobile Broadband tab.


And then click on add button and then select your device and click continue.


Now select your provider's country or region and click continue and select your providers or you can add it manually.


Then choosing your tariff plan or if your plan is not listed then enter your APN address of your own plan and click continue and click on apply.


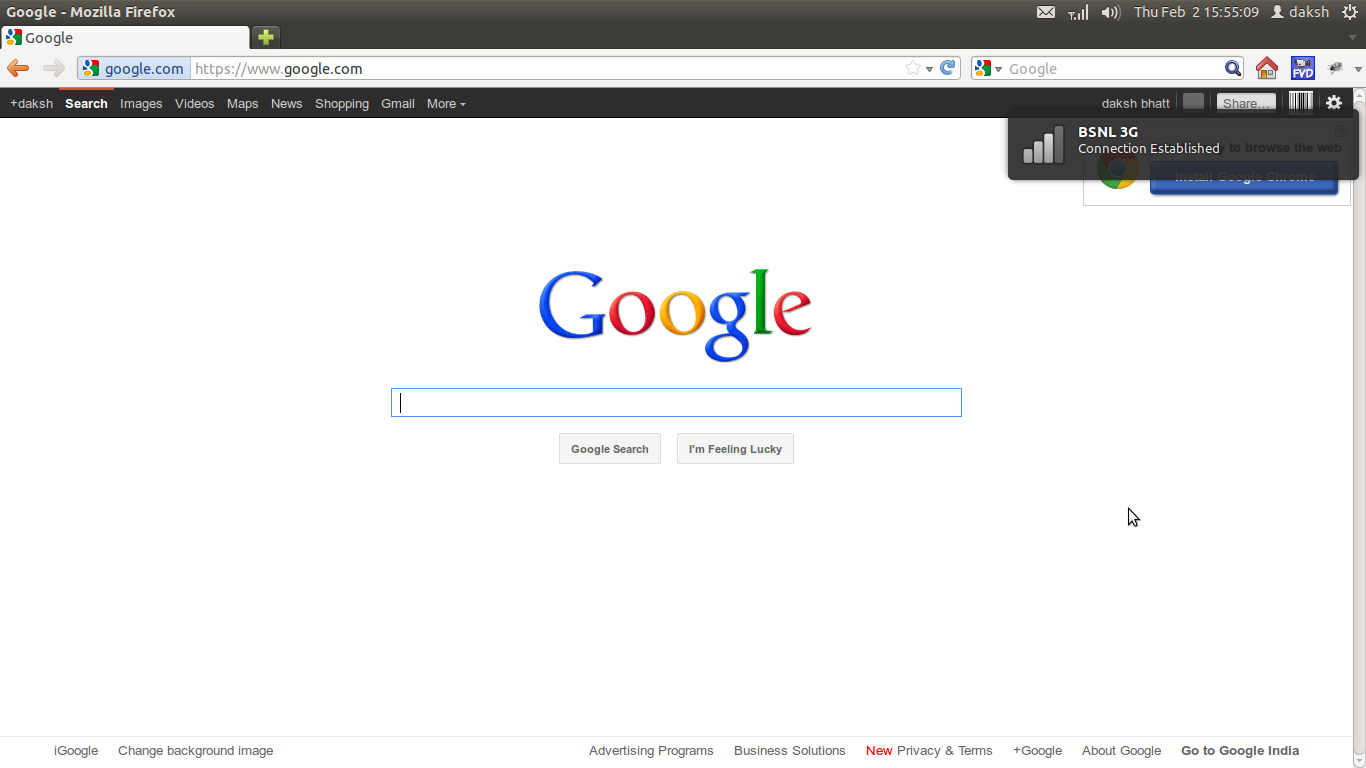
Now give the name and save the configuration. Then connect this connection from right side of the top bar.


And you are done, now you can use your internet.


Sunday, 15 January 2012

How to install Unity 5.0 interface on Ubuntu 11.10

Ubuntu 12.04 "Precise Pangolin" comes with stunning GUI Unity 5.0 interface. But is you are using Ubuntu 11.10 and want to use Unity 5.0 interface and also don't upgrade to 12.04 unstable. Then there is a better way of doing it. You can install Unity 5.0 interface in your Ubuntu 11.10 "Oneiric Ocelot" and wait for stable Ubuntu 12.04 LTS in April.

Here is the method of how to install Unity 5.0 interface on your Ubuntu 11.10. You can install it using two various method. We will show it one by one.

First method is using terminal. So open terminal [ctrl + alt + T] and write the following command.

     sudo add-apt-repository ppa:unity-team/staging
     sudo apt-get update
     sudo apt-get dist-upgrade

then restart your device to save and apply all the packages and Unity 5.0 will be installed on your Ubuntu 11.10.

Second method is somewhat tedious, in this you have to add Personal Package Archives [PPA] to your software source. For that open your USC [Ubuntu Software Center] goto edit tab and select Software Sources.


 Then goto second tab Other Software and click on Add....


 Now in new window type "ppa:unity-team/staging" and click on Add Source. 


Next open your update manager and check for new updates. 


Here all new updates of Unity 5.0 will be listed. Download them and restart your device. After restart you can see the Unity 5.0 will be install on your device.

Here is the video tutorial for the second methos how to install Unity 5.0 using PPA.


Monday, 9 January 2012

How to install XAMPP in Ubuntu


In this tutorial you can understand how to install XAMPP in Ubuntu. XAMPP is the package which provide you PHP, Apache, MySQL, Sqlite and many more other services. Earlier XAMPP was known as LAMPP so don't get confused, you are on the right way.

As XAMPP comes in compressed package. You have to decompress it and install it. For this you have to use terminal so open terminal [ctrl+alt+T] and type the following commands step by step.


1.   First you have to extract file from their '.tar.gz' file using
      the following command in /opt directory.

           sudo tar xvfz xampp-linux-1.7.7.tar.gz -C /opt


2.   Now XAMPP is installed in /opt/lampp directory so you
      can start it by issuing the following command.

            sudo /opt/lampp/lampp start


and you get the following message if the installation done successfully.

Starting XAMPP for Linux 1.7.7...
XAMPP: Starting Apache with SSL (and PHP5)...
XAMPP: Starting MySQL...
XAMPP: Starting ProFTPD...
XAMPP for Linux started.


Now you can check the installation of XAMPP by writing http://localhost in any of your browser.


If in case you want to remove XAMPP, first you have to stop all the services which are currently running. For this execute the following command.

      sudo /opt/lampp/lampp stop

And you get the following information.

Stopping XAMPP for Linux 1.7.7...
XAMPP: Stoping Apache with SSL...
XAMPP: Stoping MySQL...
XAMPP: Stoping ProFTPD...
XAMPP stopped.

Now issue the following command to remove/uninstall the complete directory /opt/lampp

        sudo rm -rf /opt/lampp


If you want to see the video of this tutorial for how to do, here is the video of it.


Sunday, 8 January 2012

Binary Clock in Unity Dash in Ubuntu 11.10


If you want to see the time in your unity dash and also in the binary form then you have to install binary clock to your Ubuntu 11.10. To install this utility you have to enter the following command in your terminal [ctrl+alt+t].


1. You have to add their repository by issuing the following command.

     sudo add-apt-repository ppa:markjtully/ppa

2. After that you have to install and update it using the following command.

     sudo apt-get update && sudo apt-get install unity-binaryclock-lens

After that you have to restart your system or end your session. The very next time login you found the binary clock button in your dash home at middle-bottom side and the output of that thing is given in the following snapshot.


Here from the snapshot, we can conclude that the position of the buttons which are active at that time of hours, minutes and seconds are calculated below.

Hours = 1 = 1
Minutes = 1+2+8+32 = 43
Seconds = 2+4+8+16 = 30

Time =1:43:30

Thursday, 29 December 2011

How to format pen drive from terminal in Ubuntu


Many times it happens that your pen drive or memory cards does not formatted from file manager so you have to format it from terminal. In this tutorial, it is shown that how to format pen drive or any other hard-disk or memory card from terminal using commands in Ubuntu.

This video gives you a complete idea of how to format pen drive from terminal and which commands you have to type.


I also attached the screenshots of this commands from terminal window step by step.


[1]  First of all type the below command for know the name of your pen 
       drive or memory card. [here | (pipe) operator is used which is given 
       above your enter key in most of keyboards.]  

       dmesg | tail

Or you can use the following command as above will not be work on some system.

       fdisk -l


[2]  Then unmount your pen drive using the following command.

       sudo umount /dev/sdb1

And enter your password.


[3]  Then enter the following command to format your pen drive with 
        FAT32 partition.


       sudo mkfs.vfat -n 'Ubuntu' -I /dev/sdb1

Your pen drive is now formatted and ready to use.


Monday, 26 December 2011

Software Center in Ubuntu

In our day to day life, we choose the operating system according to the availability of the various kinds of softwares available for the particular operating system.

So in Ubuntu there is Software Center is available for downloading and installing application. You don't have to find the application from any other websites or from torrents, you can easily download and install the application you want.

There are many categories in Ubuntu Software Center for the sake of ease.
Here I enlist the all categories which are available in Software Center.

  • Accessories
  • Developer Tools
  • Education
  • Fonts
  • Games
  • Graphics
  • Internet
  • Office
  • Science & Engineering
  • Sound & Video
  • System
  • Themes & Tweaks
  • Universal Access

Here are some screenshots of Software Center which gives you a more clear idea about it.


You can also see that which application you installed previously on which date and lies upon which category.


And the last portion but not least, gives you the details of all modification like updates, removals, installation etc.


To install any specific application you can search the keyword on the top-right corner of the Software center. It enlist you the all application contain the search keywords.


After installing any application you can see it on your dash or by pressing 'Super[Windows key] + A'.


Wednesday, 21 December 2011

System Monitor in Ubuntu


System Monitor comes in-built in Ubuntu which contain four parts System, Processes, Resources, File Systems. Now we look at what information each part contain with snapshots.

  1. System :
    It contain the basic information about which version of Ubuntu you are using, which version of Linux Kernel is there and which version of GNOME is there.
    In this portion you can know how many RAM and which processor you are using and System status also tell you about how much space available on disk.


  1. Processes :
    In this portion, you can know which processes are running and which are sleeping. And you can also know how much memory and how much CPU time they take in order to complete their processes.


  1. Resources :
    In this part, you will get the graphical information about how many percentage of CPU is used at that time, how many portion of memory[RAM] and swap value is used at that time and in network history you can see how many data is sent and received.


  1. File Systems :
    In this portion, you can check the status of the hard disk or any removable device like pen-drive, memory card or portable hard-disk. Here you can see the details like the type of the device, total space of the device, how much space free and available on the device and how much space used on the device.


Sunday, 4 December 2011

How to increase/decrease brightness on Ubuntu

There is always need of adjusting brightness while working with laptop or notebook in Ubuntu. Here is the solution how to increase/decrease brightness in Ubuntu via terminal. You have to type the following command in terminal to adjust the brightness.

"$ sudo setpci -s 00:02.0 F4.B=xx"
         where xx= all hexadecimal value between 00 to ff
         [00=highest brightness  ff=lowest brightness(total dark)]


If you enter 'ff', the whole brightness has gone the screen will become totally dark so be careful at there. This command will be very helpful to you if you work in very darker or in very lightning room. The average working brightness level is 'aa' which i prefer to work. 

Thursday, 20 October 2011

How to install Ubuntu 11.10 on Virtualbox

At 13,OCT 2011 Ubuntu 11.10 named "Oneiric Ocelot" has been released. It comes with unity. It available on both 32 and 64 bit. This version contain many new features. Here in this article you can find that how to install Ubuntu 11.10 on virtualbox.


In this video, you learn the installation step by step like how much RAM is required, how much memory should given to it, from where you can select the .iso image and how to install it. Here we use Ubuntu 10.10 as the host OS.